categories
Assembled stamps
Sealing Wax
Craspire DIY Project--How to Make Translucent Plant Wax Seal Stamps
Hello, my dear friends, welcome to Craspire project. Today we are going to share how to make translucent plant wax seal stamp with 25mm wax seal stamp head. In this tutorial, We use a blank stamp head and this can better show our plant patterns. Read more and start with Craspire!
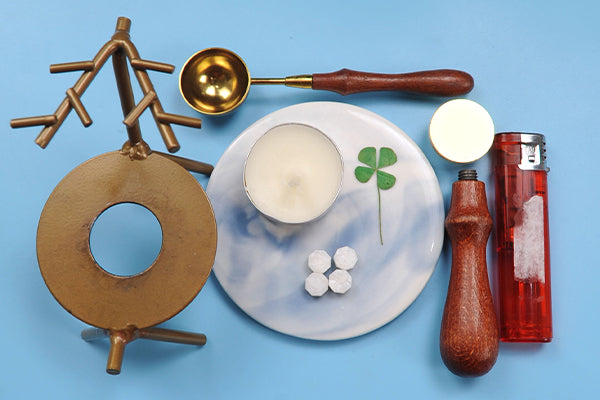
Supplies Needed for This Project:
Dry plant decorations
Tealight candle
Seal mat
Lighter
Spoon
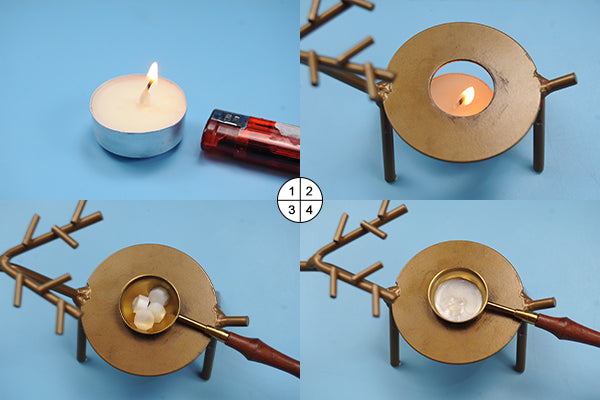
Step 1: Melting wax beads
1. Light up your candle and be careful to use the lighter.
2. Put the lighted candles under the wax furnace.
3. Put your spoon on the furnace and put four white wax beads in the spoon. Please be careful not to touch the surface of warmer.
4. Wait for the wax beads to melt slowly.
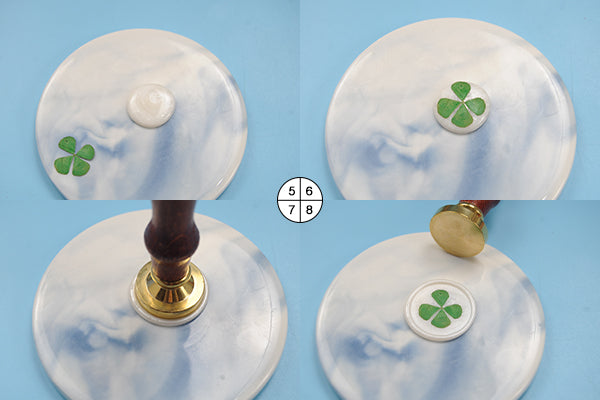
Step 2: Stamping on the seal mat
5. When the wax is all melted, please pour the wax onto your seal mat. We can try to make the shape as round as possible.
6. Put a dry plant on the wax. Then you will see a beautiful model finished.
7. You can use a blank wax seal head to press it. Before you remove the stamp, you can wait for seconds to chill the wax. That’s an interesting try!
8. So a beautiful plant wax stamp is finished. Do you like this four-leaf clover pattern?
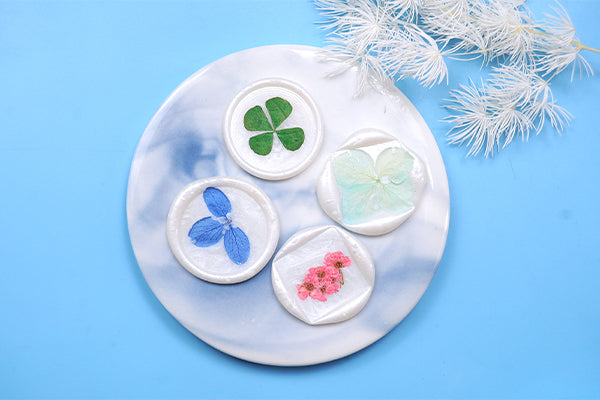
Do you think it is difficult to make such a beautiful translucent wax seal stamp? We can add different dried flowers to make different patterns according to the above steps, such as pink flowers, blue flowers and so on. Which one do you enjoy? Look forward to your ideas.
Thank you for watching! A hug from Craspire.


